

Blog Tips: Giveaways
Selasa, 23 April 2013

No matter what type of blog you have, running giveaways is a great way to gain exposure, followers, and success; especially if you're new to the blogging community.
When I made the move over to the Blogger platform in December and had my new blog design and name reveal in January, I had a huge giveaway that included ad space, products, and gift certificates from other bloggers in the community. I went from having just a handful of followers to over 100 in just a weeks time. But you can't just post a giveaway on your blog and let it sit there hoping people will come and enter. Today I am going to share with you the types of giveaways you can run, who you can get involved, how to run a giveaway, and how to promote it so that not only your giveaway can be successful, but your blog as well.
Types of giveaways/who's involved:
Self Sponsored:
Self sponsoring means that you are the only sponsor/provider of a prize and no one else is involved. Sponsoring your own giveaway can be great if you have product or ad space to offer. If you have a shop or make your own items/products or have ad space to giveaway you can set your own limits. You can giveaway anything, really! When I co-blogged for Sew Basted I Wanna Purl, we gave away thrifted craft books and purchased craft items, so it doesn't necessarily have to be something you've made.
Paid Sponsored:
Paid sponsored means that a company, blogger, or person has either given you cash, check, or product/incentive to host a giveaway and will provide in addition to payment a prize for the giveaway. I have hosted several of these and am always happy with the results. These are great because you get to try out product [if thats their form of 'payment'], make new friends, and help out another blogger/comapany/person. But they're even more great because the sponsor will be sharing the giveaway via their social media sites as well so thats double exposure for you! But they're not just giving you something to host a giveaway; typically they want you to write a paid sponsored post on the product or service so be sure to do that when you run the giveaway!
Blogger/Shop Sponsored:
A blogger/shop sponsored giveaway basically means that another blogger or bloggers [or shop owner{s}] is donating ad space, gift cards or product for the giveaway. Typically you will host these with your months sponsors in an effort to gain more followers for yourself as well as your sponsors. Some of your sponsors may just be bloggers, some of them are both a blogger and shop owner so they will donate either ad space or product or both. Some bloggers host this type of giveaway by having all of the sponsors involved donate money toward a gift card. These are my favorite because every blogger out there I follow usually does Target or Starbucks and I am all about both, especially since there is a Starbucks in Target!
How to run a giveaway:
Plan:
Before you get all gung-ho and publish a giveaway, you need to give it some thought.
- Why do you want to run a giveaway?
- Are you wanting to have one because you reached a certain amount of followers?
- Do you want to host one with your month's sponsors?
- Is a giveaway something you want to do every month?
- What type of giveaway do you want to run?
- Self sponsored, paid sponsored, blogger/shop sponsored?
- Who will you get involved?
- If its a paid sponsored giveaway you either need to contact the company, blogger or person or maybe they've already contacted you?
- What are you giving away?
- Product? Ad space? Supplies? Someone else's product/services?
- How long will the giveaway last?
- How should people enter?
- How many winners?
Once you have a plan, you can start to execute it. Contact anyone you want involved and sort out the details with them. If it's a paid sponsored giveaway, usually the company/blogger/person will give you guidelines. If you have other sponsors, they'll let you know what they can give. But no matter who is involved, you'll need to get information from them.
Entries for the giveaway:
There has to be something that the readers need to do in order to enter the giveaway. You can have them do one thing or ten things; but whatever it is, you need to be sure you're very clear about it. Here are some ideas [and things I've used in the past] for my giveaways:
- Leave a blog post comment [could be anything or specific to the giveaway]
- Follow on Facebook, Twitter, Pinterest, Instagram, Bloglovin', GFC, Hello Cotton, etc. [and/or any of your sponsors of the giveaway]
- Subscribe to RSS feeds
- Fave their Etsy/Storenvy/Big Cartel shop
- Pin an image or the giveaway
The entries are almost endless depending on the type of giveaway you're having and what you're giving away. If you have a sponsored giveaway, be sure to ask them for any links they want as entries so they can gain the same exposure as you and make it fair for them for sponsoring.
What to include:
When you have your plan for the giveaway knocked out, all parties involved contacted and info collected, this is what you are going to want to include in your post [typically in this order, though not necessary]:
- Giveaway header image
- Introduction to the giveaway
- People involved [include images of them or their product with captions of who they are or what it is and any links to their blog, social media sites, shop, etc]
- Information on how to enter
- Timeline for giveaway
- Terms & Conditions
- Entry form
- Be sure to thank everyone and wish them luck!
Entry Forms:
I only know of two ways to have people enter a giveaway; by leaving a comment with any information required on that particular post or through Rafflecopter.
If you're using Wordpress or another blog platform that does not allow you to embed codes into posts you can have entrants leave a comment on the post stating that they've followed you, liked you, etc etc. Then you can use a site like random.org to choose a winner by entering in their names. This is an okay way to have people enter, but I suggest using Rafflecopter. This is why:
Rafflecopter allows you to fill out a form with all of the links and info needed for your entries and gives you a code to embed into the HTML portion of your blog post. When people come to your post to enter the giveaway, they simply follow the prompts on the Rafflecopter form and all information is stored on your account where you can check entries and see that information. Rafflecopter is also awesome because when the giveaway has ended, you're able to have the Rafflecopter form choose, at random, a winner for you and post it on the form which will show up on your post. You can then contact your winner via the information they provided. See, amazing. It practically does all the work for you! Since switching to Blogger, this is the only thing I use for my giveaways. It's free, too!
Promoting your giveaway:
Once you have the post written up, previewed [to make sure everything looks correct and the entry form shows up], and is published, now it's time to put it on blast. There are so many ways to promote your giveaway!
- Sharing via Google+
- Giveaway link ups
- Giveaway groups on Facebook
- At the bottom of any following blog post
If any sponsors are involved be sure that they share via their social media sites as well. This is the part that gains you more exposure, followers, and success!! Initially sharing the giveaway is great, but be sure to do it a few times a day, daily, until the giveaway is over. Let all your friends, family, bloggy friends and community know that you're having a giveaway. Have a reminder at the bottom of any blog post you publish after the giveaway, too, so that any new follower who didn't know about your giveaway now does. Promote, promote, promote!
As a blogger we are already promoting ourselves daily so this should be the easy part for you!
Be sure to make your giveaway fun! Light up your post with bold letters and colors; include photos or giffs; talk highly of your sponsors and anyone involved!

And well, since I'm writing up a post on running giveaways, we thought it would be fun to run a little giveaway ourselves! All of us contributors here feel that building up the blogging community with unique and original bloggers is super important. With plans of highlighting bloggers in future monthly posts series, what a better way to kick that off by giving away a prize of being a solo featured blogger for May??
If you're the winner, we will feature your blog/shop in a post in May with links to up to 4 additional social media sites, a photo of you and/or product you make, as well as a little blurb so that our readers can learn a little bit more about you and go check you out! The giveaway will end Monday, April 29th and the winner will be announced/contacted the next day! The featured post will go up May 6th! Please use the Rafflecopter form below to enter. Thank you for all of your guys' support!
a Rafflecopter giveaway

Getting To Know You: Gaining Followers
Senin, 22 April 2013

A while back we talked about what worked for us in gaining followers, but we want to know what has worked for you? Were you able to gain followers in ways other than what we had talked about? Is there any advice you can offer to the other readers? Leave us a comment below or send us an email at b.you.blog [at] gmail [dot] com.
Challenge: Let's all make some new friends by visiting the other blogs who leave a comment on here!

Blog Tips: Be Consistent Without Blogging Every Day
Rabu, 17 April 2013

One of the most important things in blogging is figuring out a schedule. When you first start your blog, as we have gone over in the past, you should figure out a schedule that works best for you. Over time, as your content changes and grows along with your blog, your schedule may change as well. But you don't have to blog every day, or even every other day, in order to keep your readers engaged and your blog a success. Here I will share with you some tips on how to keep consistent with posts.
Content:
I suggest keeping a blog notebook with you at all times. I carry around one with me in my purse so when I get ideas for a blog post I can jot it down real quick. Making sure that you have a list of ideas for posts can help keep you on top of your blog to make sure you don't run out of content, keeping you consistent.
Blog Schedule:
Whether you have had your blog for years or are just starting out, having a blog schedule is key. You could set the schedule so that you blog [meaning, posts are published or scheduled to publish, on these days] Monday, Wednesday, Friday and have weekends off. Or you could only blog Monday and Friday. Whatever day[s] of the week you plan to have posts published, keep to that schedule. In the above mentioned notebook, you could write next to each idea the day/date you plan to have the post ready by to be published, keeping your ideas for content just as organized as the days you want them to be published on. Once you have your blog schedule figured out, it would be a good idea to write up a post or include in your 'About Me' or 'About this blog' section what days you will have posts for your readers. This will give them a heads up on when they can plan to visit your blog and read new content.
Blog Series:
Many bloggers out there, myself included, have one or two weekly blog series that they do. They could be anything from blog hops to Instagram updates to what you're currently up to. Whatever series you plan to have, be sure to stick with it and publish them on the same days every week. It will give your readers something to look forward to every week to either link up or read and wont leave them hanging when they visit your blog on Monday when your 'Monday Madness' series isn't there.
Change:
All bloggers grow within their blogs which means content will change and grow as well. Maybe the schedule you set for yourself isn't quite working out for you a year down the road and you may need to blog more or blog less. Making the transition in your schedule can be sudden or subtle, but whatever your approach I suggest giving your readers a little heads up. If your weekly link up is becoming too much for you, but you have dozens of participants, plan to send them an email or in your final link up mention that this week will be the last week and to thank them for their participation and support. Or if you've blogged only two days out of the week and your blog has grown as more ideas pour in, you could give a little reminder at the bottom of your posts that you have more content to offer them or even write up a new post mentioning the growth of your blog. Change in your blogging schedule can be a smooth transition for you and your followers as well.
Keeping your readers/followers engaged is very important so when you stay consistent you can keep the love and support of them through out your blogging career. You don't have to blog every day to be consistent and as long as your readers know when to visit your blog and you follow through with a post, your blog will flourish and be as successful as you want it to be.
We would love to come check out your blogs! Leave a link to your blog in the comments below so we can come say hi! Thanks!

I Can Photograph That: Part 2 | What Does This Do?
Senin, 15 April 2013
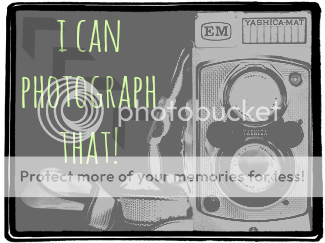
Hello again: Now that I've shared a little bit about purchasing a new camera I can begin to explain how to use the darn thing! If you are like my father, technology and all those fancy buttons can be intimidating and down-right confusing. You may be left scratching your head saying, "what does AV mean" or "what the heck is a bulb setting? can't I just turn it on and go?" Well the answer is yes; you can simply turn the camera on auto and hope for the best or you can learn what your technology is all about.
Now I'm not saying don't use the auto function, but it is beneficial do know what your camera is doing on auto. So below I will list some basic camera lingo that your buttons may say or the camera's manual will talk about.

If you recently have purchased a camera or own one you may be wondering what all those buttons or options mean. I can't explain every single camera on the market but I will let you know some universal definitions and what some of the letters/numbers mean.
Standard cameras usually have these settings: Auto, M (Manual), Tv, Av, & P.
AV- Aperture Value/Priority. This setting lets your camera know how much light is coming into your lens. An aperture is the diameter of the opening in a lens; think of it like an eye, the more open the more light, etc. Every lens has a different aperture range, and on point n' shoots you can adjust it to the settings without interchanging lenses. You choose the aperture in this setting and the camera will find the correct shutter speed for each exposure.
TV- Shutter Value/Priority. This setting lets you control the shutter speed in the camera (basically meaning how long your shutter stays open per shot). The shutter is what enables you to capture motion. It allows light to pass through for a certain amount of time (blink your eye, that is a form of a shutter). Speeds can range and vary depending on which camera you are using. You choose the shutter speed in this setting and the camera will find the correct aperture for each exposure.
M- Manuel mode. This setting lets the user have complete control of the camera's aperture and shutter speeds.
A(AUTO)- Auto mode. Your camera has control and you are basically the robot. All you need to do is point, your camera will automatically translate your scene into (hopefully) the correct settings. To be honest, I would recommend to stay away from Auto because using it is usually only a 50/50 chance of getting the correct image.
P- Program. It's like auto on crack ;) - The camera still chooses the aperture and shutter speeds but you are allowed to have control over other options such as ISO.

Here are some other terms you may see on your camera or come across while exploring:
Autofocus- Your focusing distance is set automatically. Usually a camera will show you where it is actually focusing, either by a red square or on point n shoots will show with a box over the focus point.
B- Bulb. This is a shutter speed which means the shutter will stay open for however long the shutter release is pressed. Usually used for night exposures or to show motion.
C-41- This is the current process for developing negative film (film cameras only).
Composition- The arrangement of subject matter (how you take the photo).
Crop- When cropping you are selecting what you want in the frame of your camera. You can crop while editing your images if necessary.
Dedicated Flash- Flash is a light source, or a strobe and comes in many different powers and sizes. A dedicated flash will sync up with your camera's settings and coordinate with correct exposures.
Exposure- Amount of light that enters your lens.
F Number or F/Stop- These numbers are usually show like: f/1.4 or f/22 and can vary from camera to camera. It is what your aperture is set at.
Highlights- The brightest part of your scene. Some cameras will show you the highlights on an image taken. Very important to make sure your highlights are never too high!
ISO- Film speed (digital or film cameras). In general, the most popular film speed or ISO is 400.
Macro- Close up photography. Great when you want to show detail.
There are many more buttons, logos and options that cameras have...so if you are trying to figure out what that button means please leave a comment below. Old or new cameras!

How To: Remove the Blogger Picture Shadow
Jumat, 12 April 2013

I don't know about you, but one of the first things that needed to go when I first started my blog, was the weird little shadow that formed behind every picture!
I mean, don't get me wrong- I LOVE BLOGGER and will forever hold them close to my heart. For the most part they are easy to use and just plain awesome! But that one little tick- that darn shadow...just BUGGED ME!
If you just cannot climb in the same boat as me- no problem! No harm and no foul. Totally get it. But if you are sitting at your desk, hanging by the edge of your seat, going, "YES YES YES!" then this blog is for you. How to remove that silly little shadow around all of your images.

So as you can see, our blog images (and some images elsewhere) did indeed have that little bugger. I mean, I guess it's not the stupidest thing...but it sure bugged me! You Sir, gots to go!
This trick is like, SUPER DUPER simple. I promise. But I do need to say- this trick is (of course) only for Blogger users AND those that are using the SIMPLE VIEW template. So, if you're using DYNAMIC VIEW, this won't work. Also, my step-by-step will be using the new blogger interface. By "new" I mean the one you probably already have- because it was available back in like...2011 or something.
Ok! Moving on!

1. Make sure you are signed into your blog. You can tell if you are by looking at the top right corner. On your blog's homepage, click on DESIGN.

2. Next, you're going to click on TEMPLATE on the left hand side.
3. Once that has been clicked, find the CUSTOMIZE box and go ahead and click it.

4. Since we're good to go, on the left hand side, find ADVANCED and click.

5. A little scroll box will show up directly to the right. Scroll down until you find ADD CSS and go ahead and click that.

6. Next, a white box will appear. In that box copy and paste this code EXACTLY:
.post-body img, .post-body .tr-caption-container, .ss, .Profile img, .Image img,
.BlogList .item-thumbnail img {
padding: none !important;
border: none !important;
background: none !important;
-moz-box-shadow: 0px 0px 0px transparent !important;
-webkit-box-shadow: 0px 0px 0px transparent !important;
box-shadow: 0px 0px 0px transparent !important;
}Easy right? Once your code is pasted, make sure to hit ENTER after the last character, "}".

7. Once the code is pasted and you've hit enter after the last character, go ahead and click APPLY TO BLOG. If you're nervous it didn't work- you will immediately notice the shadow has been removed on the preview that shows below what you're doing :)

Violà! You've now removed those pesky shadows from any and all images on your blog!
If you decide you hate it and want those shadow frames back, just follow the steps again- except delete all the text in that white box, then click APPLY TO BLOG.
Hope that helps, guys!!!

Langganan:
Postingan (Atom)

